Journey with Confidence RV GPS App RV Trip Planner RV LIFE Campground Reviews RV Maintenance Take a Speed Test Free 7 Day Trial ×


Join Truck Conversion Today
Reply
 
LinkBack Thread Tools Search this Thread Display Modes
 
Old 02-08-2023, 11:08 AM   #101
Senior Member
 
Pntyrmvr's Avatar
 
Join Date: Mar 2019
Location: GTA
Posts: 155
Default

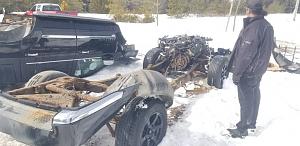
Time for an update.

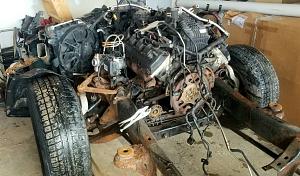
Here she sits now.

Getting ready for a 2007 5.7 Hemi engine swap. The factory 440 was fine for torque, but down on horsepower. And made way too much heat.

And got 7.5 mpg.

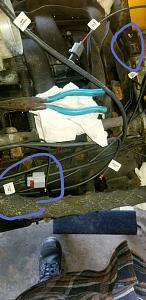
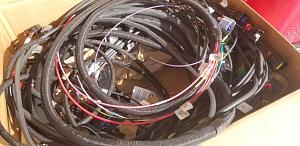
PCM being tweaked. I gave up on making a harness. Too much trouble finding the right setup in local wrecking yards.Click image for larger version

Name:	20230206_214213.jpg
Views:	8
Size:	43.9 KB
ID:	3591Attachment 3592Click image for larger version

Name:	20230103_101651.jpg
Views:	8
Size:	56.6 KB
ID:	3593Click image for larger version

Name:	IMG_2686.jpg
Views:	9
Size:	98.6 KB
ID:	3594
__________________

Pntyrmvr is offline   Reply With Quote
Old 02-08-2023, 11:10 AM   #102
Senior Member
 
Pntyrmvr's Avatar
 
Join Date: Mar 2019
Location: GTA
Posts: 155
Default

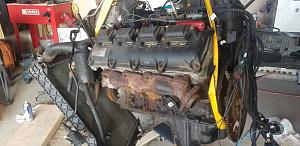
Last photo is an 03 Hemi in a 1977 Dodge B200 van that Ron in Ontario built years ago.
__________________

Pntyrmvr is offline   Reply With Quote
Old 02-08-2023, 11:22 AM   #103
Senior Member
 
Pntyrmvr's Avatar
 
Join Date: Mar 2019
Location: GTA
Posts: 155
Default Next steps

Wiring harness ordered.

Remove transfer case and trans from sideways donor 2007 Aspen.

Unbolt Aspen body from frame.

Right Aspen.

Pull 5.7 from Aspen.

Pull 2wd trans from old 1991 van.

Swap output shafts from 1991 transmission to rebuilt A518 4WD trans I had rebuilt for another truck.

Test fire 5.7 and A518 with new harness.

Pull 440 from 1979 MB400.

I'll add to this as I go.
Pntyrmvr is offline   Reply With Quote
Old 02-13-2023, 12:35 AM   #104
Senior Member
 
Pntyrmvr's Avatar
 
Join Date: Mar 2019
Location: GTA
Posts: 155
Default

50° here today and sunny which is abnormal for February.

Sat in a chair and unbolted the starter, transfer case, and transmission in 2.5 hours.

I like how this position of the donor presents itself. Click image for larger version

Name:	20230212_164141.jpg
Views:	4
Size:	93.1 KB
ID:	3595
Pntyrmvr is offline   Reply With Quote
Old 03-27-2023, 02:54 PM   #105
Senior Member
 
Pntyrmvr's Avatar
 
Join Date: Mar 2019
Location: GTA
Posts: 155
Default

Flipped the body of the donor 2007 Aspen off the frame and put the frame into the garage.

Pulled the engine and returned frame outside.

Tested the Hotwire harness. MAP sensor plug too short, AC, and alternator plugs too long. Quick note to Chris Squier at Hotwire got me a same day build on an extension wire for the MAP circuit. Should ship today.

Ordered 3 extra feet of harness so fuse box, relays, and PCM can mount under dash below glovebox.

I will mount up transmission, starter, and fuel pump for a test start before I commit to pulling 440 from Cubicle.Click image for larger version

Name:	20230311_133903.jpg
Views:	5
Size:	66.9 KB
ID:	3607Click image for larger version

Name:	20230312_135649.jpg
Views:	6
Size:	84.4 KB
ID:	3608Click image for larger version

Name:	20230324_135424.jpg
Views:	6
Size:	73.4 KB
ID:	3609Click image for larger version

Name:	20230324_160845.jpg
Views:	6
Size:	80.4 KB
ID:	3610Click image for larger version

Name:	20230316_161010.jpg
Views:	5
Size:	85.5 KB
ID:	3611
Pntyrmvr is offline   Reply With Quote
Old 03-29-2023, 08:01 AM   #106
Senior Member
 
Join Date: Oct 2020
Location: Brockville
Posts: 103
Default

Nice!! Keep at it!!
6cuda6 is offline   Reply With Quote
Old 05-01-2023, 09:42 AM   #107
Senior Member
 
Pntyrmvr's Avatar
 
Join Date: Mar 2019
Location: GTA
Posts: 155
Default

Bolted the engine up to the transmission that came with it.

Original starter was dust. Bought used replacement.

Factory fuel pump worked after a few snacks.

Wired up to battery and got it running.

Pedal position sensor is not telling PCM anything but the engine runs on the standalone wiring harness so that's fine by me.

Onward!
Pntyrmvr is offline   Reply With Quote
Old 06-06-2023, 09:05 PM   #108
Senior Member
 
Pntyrmvr's Avatar
 
Join Date: Mar 2019
Location: GTA
Posts: 155
Default

Newer pedal sensor installed and adjusted has the throttle blade moving in sync.

Put a 10 gallon Nissan Versa tank in behind factory tank with new TI pump in it.

Will use click clack pump to fill it from main tank. I'll add a separate filler pipe later.

This way I get no fuel starvation to an in tank pump and another 10 gallons on board.

Fuel sender uses same ohms as old Dodge so switch on dash sends signal to factory gauge and then hit transfer pump switch fill Nissan tank.

Regulator is a 58 psi unit with return to keep pump cool. It mounts next to 10 gallon Nissan tank. Click image for larger version

Name:	20230605_140915.jpg
Views:	7
Size:	58.1 KB
ID:	3623Click image for larger version

Name:	20230605_141935.jpg
Views:	8
Size:	99.8 KB
ID:	3624Click image for larger version

Name:	20230606_180032.jpg
Views:	8
Size:	97.7 KB
ID:	3625Click image for larger version

Name:	20230604_152924.jpg
Views:	7
Size:	41.9 KB
ID:	3626Click image for larger version

Name:	20230604_151121.jpg
Views:	7
Size:	81.7 KB
ID:	3627
Pntyrmvr is offline   Reply With Quote
Old 07-14-2023, 12:32 AM   #109
Senior Member
 
Pntyrmvr's Avatar
 
Join Date: Mar 2019
Location: GTA
Posts: 155
Default

Finally got down to the nitty gritty.

440 out
5.7 oil filter hits passenger engine mount
cut mount and move back 2-1/4"
tacked brackets together
Click image for larger version

Name:	20230709_152252.jpg
Views:	5
Size:	98.7 KB
ID:	3635Click image for larger version

Name:	20230710_140351.jpg
Views:	5
Size:	96.4 KB
ID:	3636Click image for larger version

Name:	20230711_121232.jpg
Views:	5
Size:	77.8 KB
ID:	3638Click image for larger version

Name:	20230713_162805.jpg
Views:	5
Size:	97.0 KB
ID:	3639Click image for larger version

Name:	20230713_162830.jpg
Views:	5
Size:	84.3 KB
ID:	3640
Pntyrmvr is offline   Reply With Quote
Old 07-22-2023, 05:33 PM   #110
Senior Member
 
Pntyrmvr's Avatar
 
Join Date: Mar 2019
Location: GTA
Posts: 155
Default

Pulled the overdrive crossmember out of a 1992 B250 conversion van. Cut out the original one in the 1979 and welded in the 1992 piece. The new unit has a beefy steel inner bracket 19" wide hidden beneath the stamped outer sheet metal. It also is shorter allowing the overdrive transmission needed space.

Also modified the transmission bracket to shift the transmission and engine towards the passenger side 1-1/2". The coil packs on the driver's side need the room.

Pulled the motor and welded up the relocated factory passenger side engine mount pedestal. Finish welded the engine mount brackets I made. Added gussets to the brackets because that's how the $300 aftermarket pieces for a Dodge pickup look. Plus I like welding.

And a coat of semi gloss black. For that cool look.

Driveshaft is out. Needs to be 14" shorter! This 1979 had the A727 with the bolt in output yoke. Very short compared to the A518 with overdrive. I'd say 14" longer.Click image for larger version

Name:	20230722_142144.jpg
Views:	5
Size:	98.1 KB
ID:	3641Click image for larger version

Name:	20230722_141611.jpg
Views:	5
Size:	100.3 KB
ID:	3642Click image for larger version

Name:	20230722_163638.jpg
Views:	5
Size:	98.4 KB
ID:	3643Click image for larger version

Name:	20230722_141942.jpg
Views:	5
Size:	104.8 KB
ID:	3644Click image for larger version

Name:	20230722_163531.jpg
Views:	5
Size:	96.4 KB
ID:	3645Click image for larger version

Name:	20230722_163536.jpg
Views:	5
Size:	96.6 KB
ID:	3646
Pntyrmvr is offline   Reply With Quote
Old 08-05-2023, 10:04 AM   #111
Senior Member
 
Pntyrmvr's Avatar
 
Join Date: Mar 2019
Location: GTA
Posts: 155
Default

Shortened front driveshaft 14" and modified hanger bearing mount to shift it 3/4" towards curb side.

Added 6" to curb side exhaust pipe to get catalytic converter away from transmission. Had to trim flared end of extension pipe to ensure a good seal. Modern manifold flanges are much more shallow than the old days. Wrapped the first bit of pipe as it passes within 3/4" of passenger floor.

Modern power steering pump meant for steering racks puts out too much pressure for old steering boxes. Shortened spring by 1/8" and cut pump fitting down so inverted flare adapter could use new 1979 style pressure hose.Click image for larger version

Name:	20230801_172704.jpg
Views:	4
Size:	98.1 KB
ID:	3647Click image for larger version

Name:	20230802_154847.jpg
Views:	3
Size:	84.3 KB
ID:	3648Click image for larger version

Name:	20230802_161813.jpg
Views:	3
Size:	96.6 KB
ID:	3649Click image for larger version

Name:	20230803_113327.jpg
Views:	3
Size:	94.1 KB
ID:	3650Click image for larger version

Name:	20230804_172256.jpg
Views:	3
Size:	96.7 KB
ID:	3651Click image for larger version

Name:	20230804_173559.jpg
Views:	3
Size:	95.7 KB
ID:	3652
Pntyrmvr is offline   Reply With Quote
Old 08-05-2023, 10:09 AM   #112
Senior Member
 
Pntyrmvr's Avatar
 
Join Date: Mar 2019
Location: GTA
Posts: 155
Default

OEM hose loops but fits.

First hack at a custom transmission dipstick tube.

Cut down factory heat shield. Curb side fits as is. Also cut factory muffler heat shield down to size.Click image for larger version

Name:	20230804_173605.jpg
Views:	4
Size:	100.1 KB
ID:	3653Click image for larger version

Name:	20230804_174003.jpg
Views:	4
Size:	102.2 KB
ID:	3654Click image for larger version

Name:	20230804_174413.jpg
Views:	4
Size:	100.8 KB
ID:	3655
Pntyrmvr is offline   Reply With Quote
Old 08-05-2023, 10:12 AM   #113
Senior Member
 
Pntyrmvr's Avatar
 
Join Date: Mar 2019
Location: GTA
Posts: 155
Default

No more hot right foot. Put new factory heat shields on the manifolds. 31% less revolutions at speed, better fuel efficiency, and both old and new shields should keep temperatures much lower in the cab.
Pntyrmvr is offline   Reply With Quote
Old 08-11-2023, 03:08 PM   #114
Senior Member
 
Pntyrmvr's Avatar
 
Join Date: Mar 2019
Location: GTA
Posts: 155
Default

Fuel system with added 10 gallon tank all plumbed in. Vent tees into main 50 gal tank vent and is collected in charcoal cannister.

Rebuilt both alternators including analog driver for house battery system so 175Ah gets the right voltage through an adjustable regulator.

PCM will run engine alternator charging.

New AC clutch and bearing along with barb adapters to match original "dealer" air setup.

Measured up belt using ratchet strap. Kept original one as spare so 1 alternator can be bypassed if it fails.Click image for larger version

Name:	20230809_154539.jpg
Views:	4
Size:	97.8 KB
ID:	3656Click image for larger version

Name:	20230807_162702.jpg
Views:	3
Size:	79.3 KB
ID:	3657Click image for larger version

Name:	20230810_171852.jpg
Views:	3
Size:	98.4 KB
ID:	3658Click image for larger version

Name:	20230810_154847.jpg
Views:	3
Size:	103.3 KB
ID:	3659
Pntyrmvr is offline   Reply With Quote
Old 08-11-2023, 03:10 PM   #115
Senior Member
 
Pntyrmvr's Avatar
 
Join Date: Mar 2019
Location: GTA
Posts: 155
Default

Modern starter needs some love to get it to sit flush against bellhousing face
Click image for larger version

Name:	20230805_124030.jpg
Views:	3
Size:	83.9 KB
ID:	3661Click image for larger version

Name:	20230805_125300.jpg
Views:	3
Size:	99.5 KB
ID:	3662
Pntyrmvr is offline   Reply With Quote
Old 08-16-2023, 10:16 PM   #116
Senior Member
 
Pntyrmvr's Avatar
 
Join Date: Mar 2019
Location: GTA
Posts: 155
Default

Swapped one idler for smaller one. Tensioner now right in middle of its range.

Put together relay box.

Relays to:

Provide power to overdrive and converter lockup plug on A518 OD transmission.

Hook second alternator up to house battery voltage regulator only when key is on. Prevent draining house battery.

Provide power to click clack pump that transfers fuel from 50 gallon main tank to 10 gallon secondary tank that contains fuel injection pump. This will be switched manually as needed. The fuel gauge has a switch to check levels in both tanks.

Air conditioning compressor power.

Build filler piece to mount 2400 cfm electric cooling fan on factory radiator shroud.

Flush fairly recent recored radiator and fill with ciric acid overnight to ensure it flows.Click image for larger version

Name:	20230813_164507.jpg
Views:	4
Size:	102.7 KB
ID:	3663Click image for larger version

Name:	20230815_013932.jpg
Views:	4
Size:	97.9 KB
ID:	3664Click image for larger version

Name:	20230815_201812.jpg
Views:	4
Size:	100.1 KB
ID:	3665Click image for larger version

Name:	20230816_103355.jpg
Views:	4
Size:	101.0 KB
ID:	3666
Pntyrmvr is offline   Reply With Quote
Old 09-02-2023, 06:41 PM   #117
Senior Member
 
Pntyrmvr's Avatar
 
Join Date: Mar 2019
Location: GTA
Posts: 155
Default

Filled rad flushed with fresh water for a day with citric acid overnight. Shouldn't get any more crud out right? Hah.

Radiator inlet has to move to driver's side. Yup you can buy that. And adapters to get the old and new hoses to match up. Sadly I forgot the lower hose adapter so I had to make one.

The old radiator inlet is soldered shut with a sacrificial anode installed so I can easily see if the coolant is eating up the system.

The throttle pedal and cable is from a 2004 hemi pickup. It then goes to a position sensor in a box. The A518 needs a throttle signal so it's cable will go into that same box. I hacked the tip off the 2004 pedal and welded it onto the 1979 factory setup. Then I made up a box from steel strap to hold the cable. That box is then screwed to the firewall.

The open binding barrel is machined down a bit to become the pivot for the A518 cable.
Click image for larger version

Name:	20230817_105737.jpg
Views:	3
Size:	102.6 KB
ID:	3667Click image for larger version

Name:	20230817_135146.jpg
Views:	2
Size:	98.1 KB
ID:	3668Click image for larger version

Name:	20230817_152224.jpg
Views:	2
Size:	61.3 KB
ID:	3669Click image for larger version

Name:	20230817_152236.jpg
Views:	3
Size:	65.9 KB
ID:	3670Click image for larger version

Name:	20230817_155532.jpg
Views:	3
Size:	76.5 KB
ID:	3671Click image for larger version

Name:	20230818_110705.jpg
Views:	3
Size:	69.9 KB
ID:	3672
Pntyrmvr is offline   Reply With Quote
Old 09-02-2023, 06:56 PM   #118
Senior Member
 
Pntyrmvr's Avatar
 
Join Date: Mar 2019
Location: GTA
Posts: 155
Default

Extended accelerator pedal sensor box to add cable going to A518. Side shot of factory pedal meeting 2004 accelerator cable in box at firewall.

Rad hose adapters. Radiator hoses old meets new.

2100 cfm cooling fan shrouded to 1979 radiator shroud with sheet of steel.

Gauges will show oil and transmission pressure via 2 way switch. Same for transmission and engine coolant temperature. Vacuum used to tune transmission overdrive shifting.Click image for larger version

Name:	20230818_154402.jpg
Views:	4
Size:	96.5 KB
ID:	3673Click image for larger version

Name:	20230818_161105.jpg
Views:	3
Size:	95.1 KB
ID:	3674Click image for larger version

Name:	20230818_212438.jpg
Views:	3
Size:	56.0 KB
ID:	3675Click image for larger version

Name:	20230818_223848.jpg
Views:	3
Size:	98.6 KB
ID:	3676Click image for larger version

Name:	20230819_000444.jpg
Views:	2
Size:	98.7 KB
ID:	3677Click image for larger version

Name:	20230826_172903.jpg
Views:	2
Size:	98.7 KB
ID:	3678
Pntyrmvr is offline   Reply With Quote
Old 09-02-2023, 07:01 PM   #119
Senior Member
 
Pntyrmvr's Avatar
 
Join Date: Mar 2019
Location: GTA
Posts: 155
Default

PCM, fuses, and relays will all hide under the passenger seat. Wiring loom will run left of wheel well in low spot that I'll level with top of wheel well to give passenger flat floor and protect loom.

Yup, push button start.Click image for larger version

Name:	20230830_142411.jpg
Views:	1
Size:	101.1 KB
ID:	3679Click image for larger version

Name:	20230830_183718.jpg
Views:	2
Size:	101.8 KB
ID:	3680Click image for larger version

Name:	20230830_183727.jpg
Views:	2
Size:	99.3 KB
ID:	3681Click image for larger version

Name:	20230830_162330.jpg
Views:	2
Size:	63.5 KB
ID:	3682
Pntyrmvr is offline   Reply With Quote
Old 09-02-2023, 07:03 PM   #120
Senior Member
 
Pntyrmvr's Avatar
 
Join Date: Mar 2019
Location: GTA
Posts: 155
Default

Winner, winner, steak and potato dinner.Click image for larger version

Name:	20230831_201818.jpg
Views:	2
Size:	104.3 KB
ID:	3683
__________________

Pntyrmvr is offline   Reply With Quote
Reply

Thread Tools Search this Thread
Search this Thread:

Advanced Search
Display Modes

Posting Rules
You may not post new threads
You may not post replies
You may not post attachments
You may not edit your posts

BB code is On
Smilies are On
[IMG] code is On
HTML code is Off
Trackbacks are On
Pingbacks are On
Refbacks are On


Powered by vBadvanced CMPS v3.2.3

All times are GMT -5. The time now is 02:53 PM.


Powered by vBulletin® Version 3.8.8 Beta 1
Copyright ©2000 - 2024, vBulletin Solutions, Inc.
×