 |
 07-06-2010, 06:51 AM
|
#1
|
|
Senior Member
Join Date: Nov 2009
Location: New York
Posts: 259
|
Alright here is the roof thread, give up those photos, lets see the roofs, here is mine, G
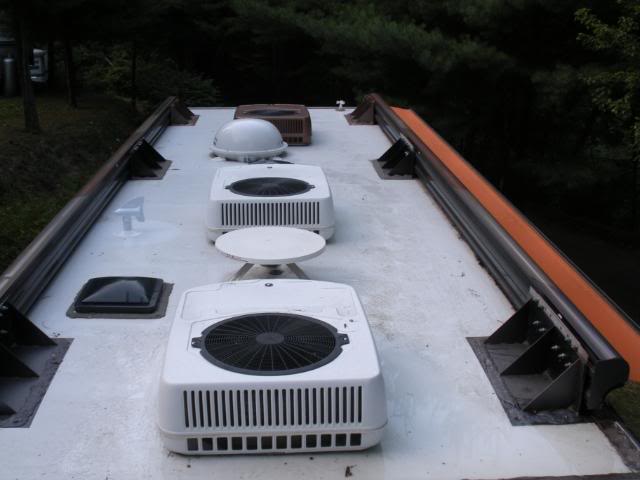
LOOKING FORWARD
|

|

|
 07-06-2010, 06:54 AM
|
#2
|
|
Senior Member
Join Date: Nov 2009
Location: New York
Posts: 259
|
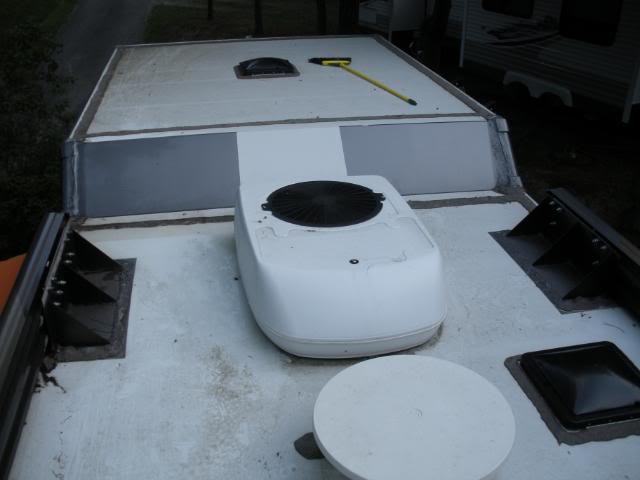
Looking Back toward the raised garage, bedroom area
|

|

|
 07-06-2010, 07:00 AM
|
#3
|
|
Senior Member
Join Date: Nov 2009
Location: New York
Posts: 259
|
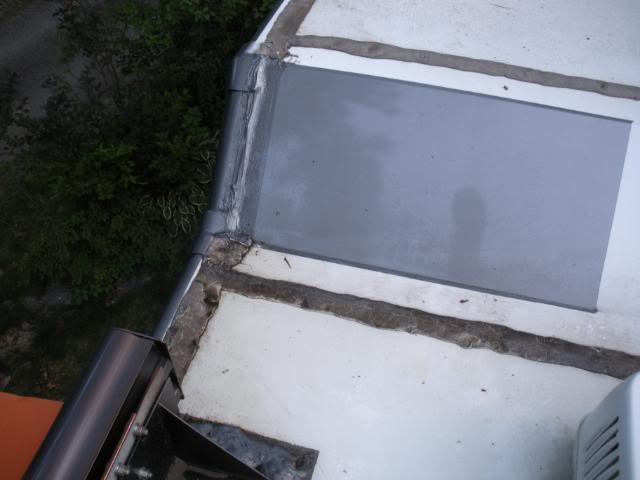
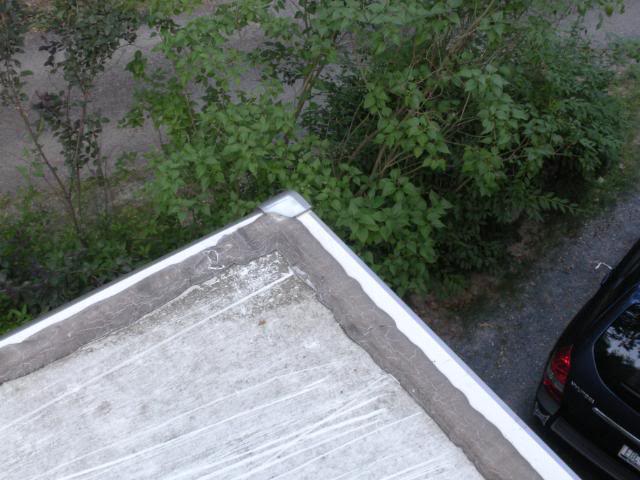
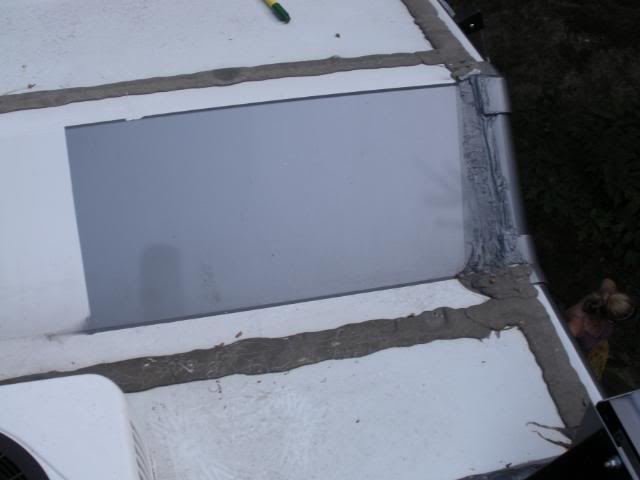
This is the corner that holds water, this weekend with the AC running, water collected in this corner, this is the passenger side of rig, right at the raised roof transition, the GOOP(CAULKING) IS raised up, mounting brackets for awning, alot going on in this corner.
|

|

|
 07-06-2010, 07:01 AM
|
#4
|
|
Senior Member
Join Date: Nov 2009
Location: New York
Posts: 259
|
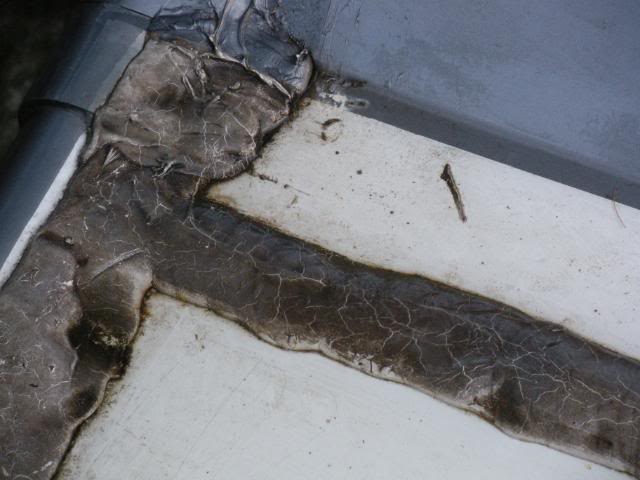
Close up of the GOOP
|

|

|
 07-06-2010, 07:03 AM
|
#5
|
|
Senior Member
Join Date: Nov 2009
Location: New York
Posts: 259
|
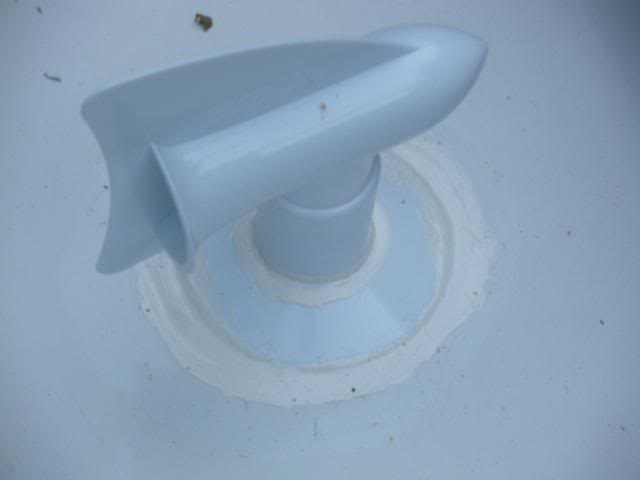
Changed out to this Cyclone Vent, sealed up with Parlastic, needs a second coat.
|

|

|
 07-06-2010, 07:05 AM
|
#6
|
|
Senior Member
Join Date: Nov 2009
Location: New York
Posts: 259
|
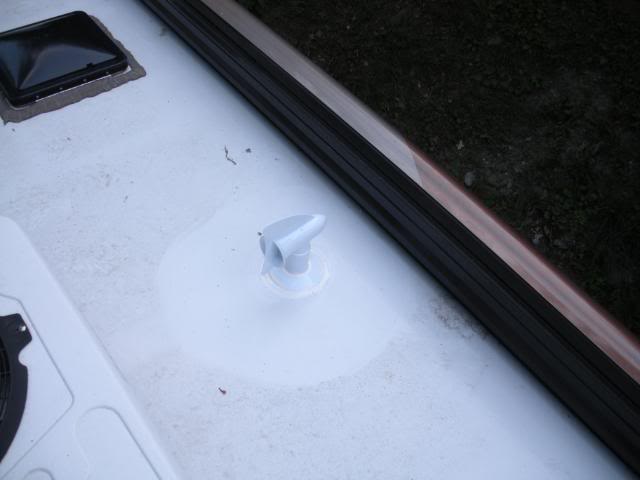
On a cooler day i will clean the whole roof, look at the difference.
|

|

|
 07-06-2010, 07:06 AM
|
#7
|
|
Senior Member
Join Date: Nov 2009
Location: New York
Posts: 259
|
Here is one more shot of the Caulking
|

|

|
 07-06-2010, 07:07 AM
|
#8
|
|
Senior Member
Join Date: Nov 2009
Location: New York
Posts: 259
|
Last one,
|

|

|
 07-06-2010, 07:13 AM
|
#9
|
|
Senior Member
Join Date: Nov 2009
Location: New York
Posts: 259
|
Lets post photos, i would like to see the differences and similarities between our Rigs. lets also use this thread to collectively trouble shoot our issues. My only problem at this point is the collecting of water in that one corner. I think part of the problem is the added height of the caulking, the bead is so high and wide, that it is creating a damning affect. The other thing that adds Ht is the extruded corner pieces..I thought about maybe removing all the sealant and replacing with Eternabond, it would sit lower(I think). what do you boys think, G
|

|

|
 07-06-2010, 11:54 AM
|
#10
|
|
Senior Member
Join Date: Mar 2008
Location: West Fargo ND
Posts: 300
|
What did you use to clean your roof? Mine is as new as yours, always inside yet still looks worse than yours.
I'll get pictures of mine, and show you a real water pooling issue.
stay tuned,
-blizz
__________________
2001 GMC 6500 Topkick, 22' box, dropped frame, designed to fit into a 9' garage door. 3126 CAT 6spd Man Lo-Pro 19.5's w/ 3.07 rear axle ratio
|

|

|
 07-06-2010, 12:20 PM
|
#11
|
|
Senior Member
Join Date: Feb 2010
Location: Wisconsin
Posts: 153
|
Gene,
OK how do you post a pic here?
__________________
Renegade Garage Rig
|

|

|
 07-06-2010, 12:37 PM
|
#12
|
|
Senior Member
Join Date: Nov 2009
Location: New York
Posts: 259
|
Quote:
Originally posted by ed s:
Gene,
OK how do you post a pic here?
|
Ed, i am no expert but i think you need to copy and paste from a hosting site like Photobucket or Snapfish. After you load on to the host site, you copy the URL, then just paste it in your post. There are probably other ways, but i am no 9 year kid with mad computer skills, Gene
|

|

|
 07-06-2010, 12:41 PM
|
#13
|
|
Senior Member
Join Date: Nov 2009
Location: New York
Posts: 259
|
Quote:
Originally posted by blizzardND:
What did you use to clean your roof? Mine is as new as yours, always inside yet still looks worse than yours.
I'll get pictures of mine, and show you a real water pooling issue.
stay tuned,
-blizz
|
Blizz, i just used some RV crud cutter i got at Campers Barn, i will note the exact brand next weekend, I just sprayed it on and basically wiped it off, my surface is real high gloss Gell, Has the finish of a nice boat Hull, Gene.
|

|

|
 07-06-2010, 03:01 PM
|
#14
|
|
Senior Member
Join Date: Feb 2010
Location: Wisconsin
Posts: 153
|
Gene not sure what I did but my pics are on new thread "T/C Roof"
__________________
Renegade Garage Rig
|

|

|
 07-07-2010, 04:45 AM
|
#15
|
|
Senior Member
Join Date: Feb 2009
Location: St. Paul, MN
Posts: 1,819
|
Gene, that's some pretty heavy duty awning mounting there. Looks very cool.
Here's the only shot I've got of my roof. I'll try to get some better ones.

Ed, I put most of my pictures into albums on my facebook page. Then if I want to show one of those pictures (as I did for that roof shot) I go to the picture on my facebook and right click over the picture. A box opens up and one of the choices down at the bottom is "properties." I scroll down and left click on "properties." That opens up a box showing the properties of that picture. It'll be a long url thingy starting with http. I copy that url by highlighting it and holding down the "ctrl" key and pushing the letter "c" key. Then in the body of where I want to put that picture I type [img]url[/img] . Those are brackets around img and /img, not parenthesis. That will make your picture show up in the post. It sounds kind of troublesome but after you've done it a few times it's pretty fast and easy.
__________________
'03 Freightliner FL112, 295" wheel base, with '03 United Specialties 26' living quarters, single screw, Cat C12 430 h/p 1650 torque, Eaton 10speed , 3.42 rear axle ratio
|

|

|
 07-07-2010, 04:47 AM
|
#16
|
|
Senior Member
Join Date: Feb 2009
Location: St. Paul, MN
Posts: 1,819
|
Woops, it didn't show how I insert the url to make the picture appear. I type [img] and then immediately after that paste in the url I had copied. Then immediately after that type [/img] and that should get the picture to display in your post. Let's see if this works.
__________________
__________________
'03 Freightliner FL112, 295" wheel base, with '03 United Specialties 26' living quarters, single screw, Cat C12 430 h/p 1650 torque, Eaton 10speed , 3.42 rear axle ratio
|

|

|
 |
 Posting Rules
|
You may not post new threads
You may not post replies
You may not post attachments
You may not edit your posts
HTML code is Off
|
|
|
|
 » Recent Threads
 |
|
|
|
|
|
|
|
|
|
|
|
|
|
|
|
|
|
|
|
|
|
|
|
|
|